Developing SU2 on GitHub (Internal Developers)
This page only applies to SU2 version 6.2.0 and lower.The new documentation section can be found here.
The repository for SU2 is being hosted on here on GitHub. As you are likely aware, GitHub is simply an online project hosting service with a very useful web interface and additional tools to aid code development with Git as its backbone. Git is a version control system (VCS) that is similar to SVN, Mercurial, etc., and it helps organize the development of code over time by tracking changes.
To get started, you need to create a personal user account on GitHub (free) and follow the basic setup instructions. These instructions include how to get Git installed on your local machine. To sync up your local settings with GitHub, change the user.email and user.name variables for your local git configuration with
git config --global user.email "your_email@domain.com"
git config --global user.name "Your Name"
Note that the email address should be the one associated with your GitHub account.
SU2 is an open-source repository that can be found as part of the su2code organization on GitHub. The web interface is useful for viewing the recent commits to the code, changes to the code over time, documentation and tutorials, or for creating and viewing branches, for instance. To contribute to the SU2 organization repositories directly, an administrator for the project must add you as a member of the developer team with push and pull privileges. However, we encourage all developers to fork the repository and to submit pull requests with their interesting new features that they would like included in the code. We regularly review pull requests as a development team.
Most of the day-to-day development of the code will be done on your local machine at the command line using Git. After setting up Git and gaining access to the SU2 repository, create a local copy of the entire repository on your machine by cloning the version that is hosted on GitHub:
git clone https://github.com/su2code/SU2.git
After cloning, you should have a new SU2/ folder in your current working directory. Move into SU2/ to see the project files and to start working with the code through Git. You can see the most recent changes by typing
git log
Typical Workflow with Git
Now that you have a local copy of SU2 from the GitHub repository, you can begin to make changes to the codebase. This section gives an example of the typical workflow for making changes to the code, committing them locally, and then pushing your changes to the remote GitHub repository.
Please read the “Code Reviews” section of the wiki before making changes to familiarize yourself with the requirements for a good code change.
In the SU2 repository, the master branch represents the latest stable major or minor release (3.0, 3.2.9, etc.), it should only be modified during version releases. Work on the code takes place on the develop branch. When a repository is cloned, all of the branches are as well, and so no additional work is necessary to acquire the development branch. However, you must tell git to switch to the development branch, which can be done with the “checkout” command
git checkout -b develop origin/develop
Now that changes will be on top of the development branch, code changes can be made. This next section describes the steps for creating a pull request.
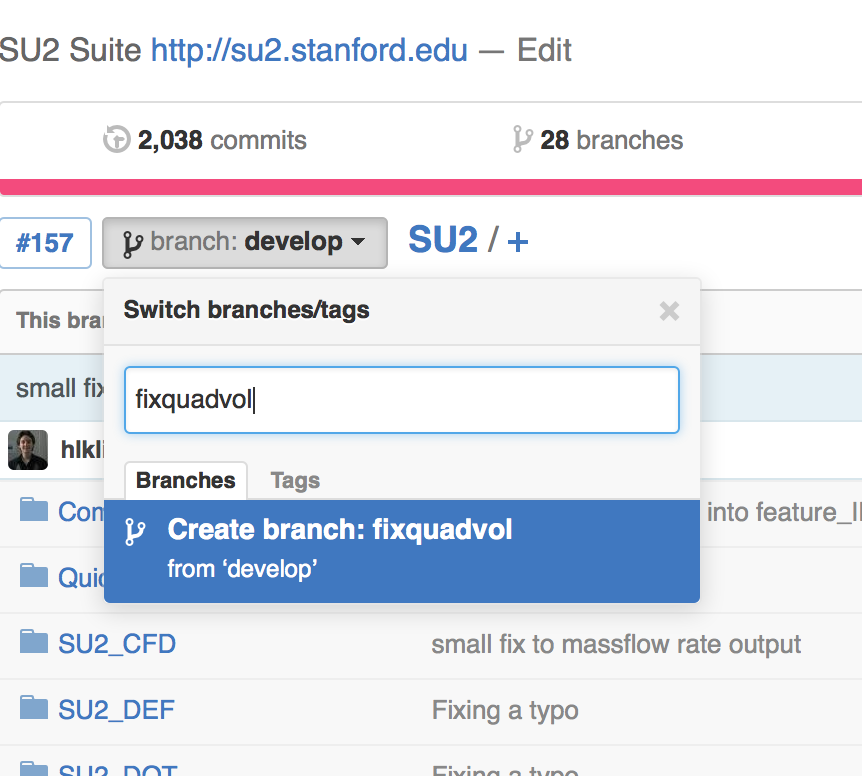
- Create a new branch for making your changes.
git checkout -b fixquadvolAdditionally, create a branch with the same name on the SU2 github repository. First, make sure the current SU2 branch is set to develop

then create a new branch with the appropriate name.
-
Make changes to the existing files (using your favorite text editor or integrated development environment, IDE) or add local files or folders to be tracked and compared against the global repo files.
git add file1.cpp file2.cpp -
Optionally check that your changes have been registered and/or the files that you want have been added added
git status -
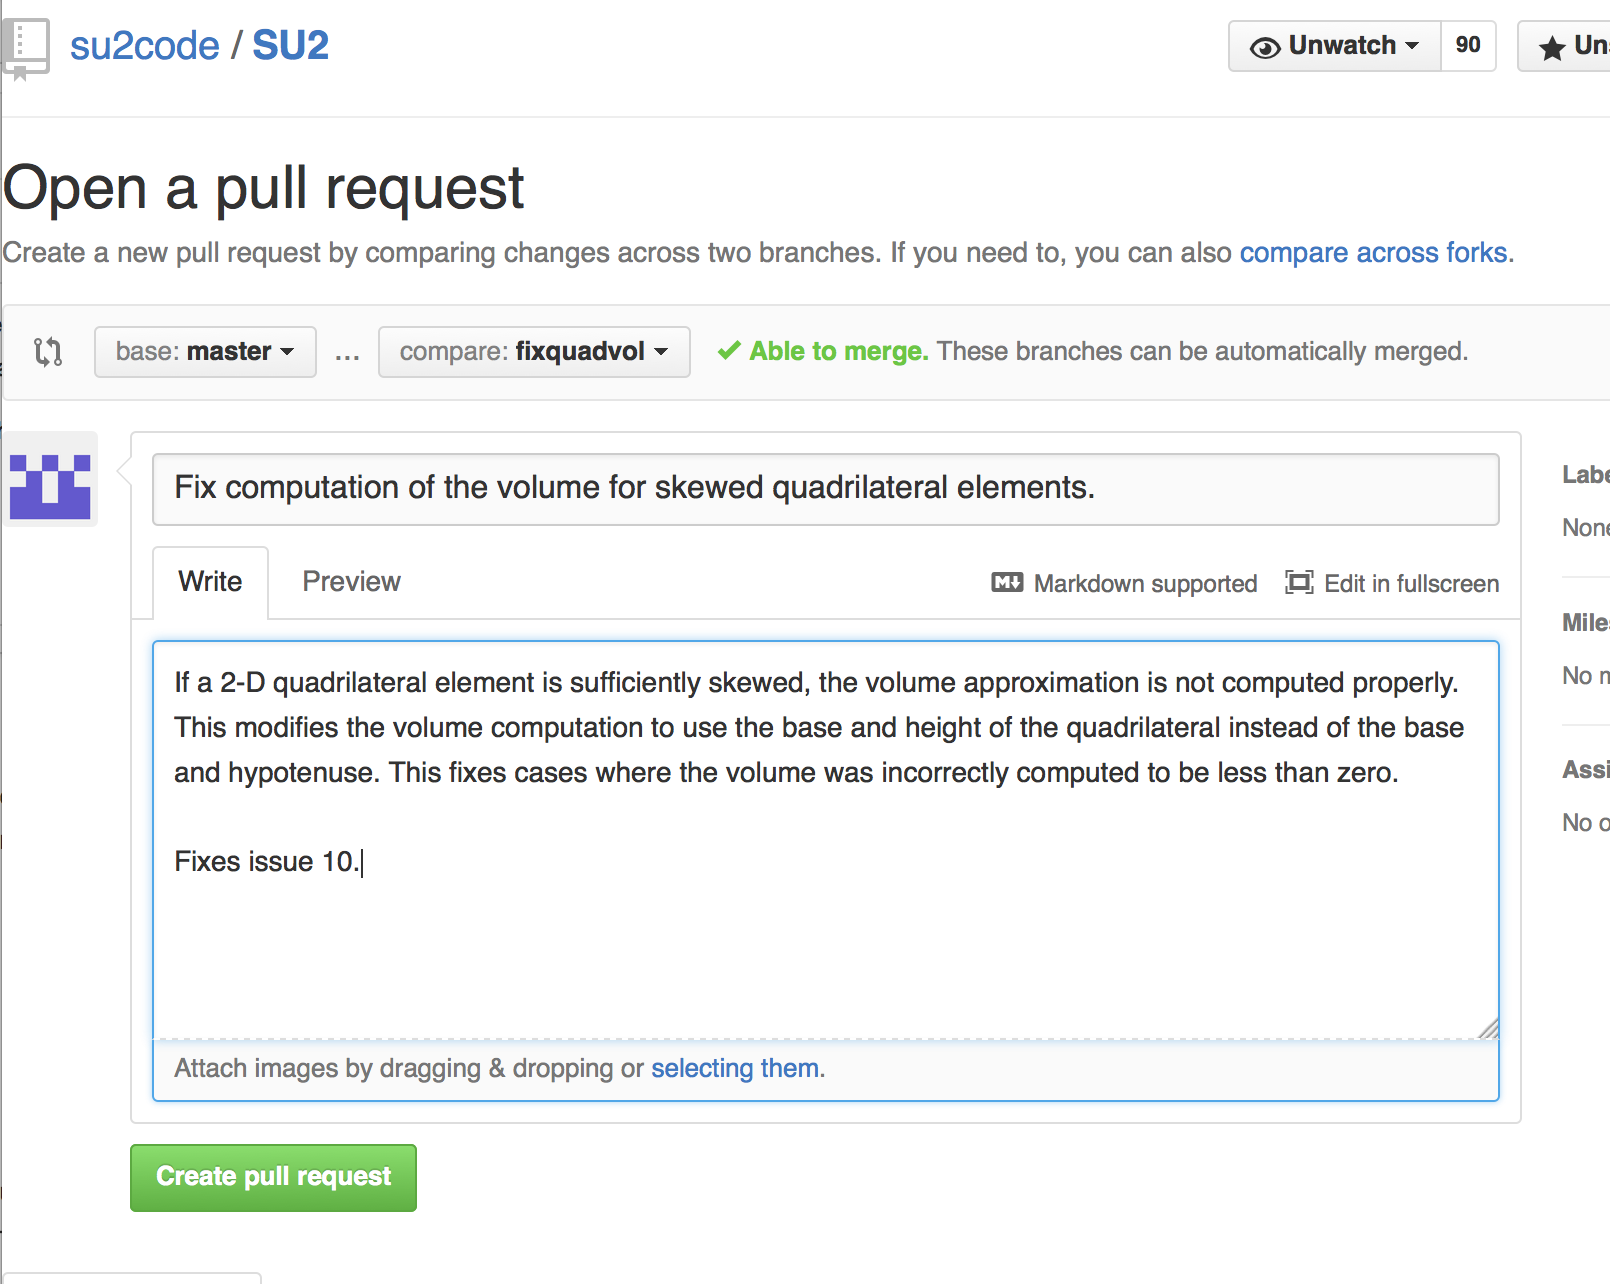
Commit the changes to your local repository (not the global repository on GitHub) and create a descriptive message about your change. Commit messages are the easiest tool for examining past code changes, so it is important that they serve as documentation. A good commit message will consist of a short descriptive message on the first line, followed by a longer descriptive message. If the PR addresses any issues, they should be identified in the commit message. A good (fake) commit message is below.
``` git commit -m “Fix computation of the volume for skewed quadrilateral elements.
If a 2-D quadrilateral element is sufficiently skewed, the volume approximation is not computed properly. This modifies the volume computation to use the base and height of the quadrilateral instead of the base and hypotenuse. This fixes cases where the volume was incorrectly computed to be less than zero.
Fixes issue 10.” ```
-
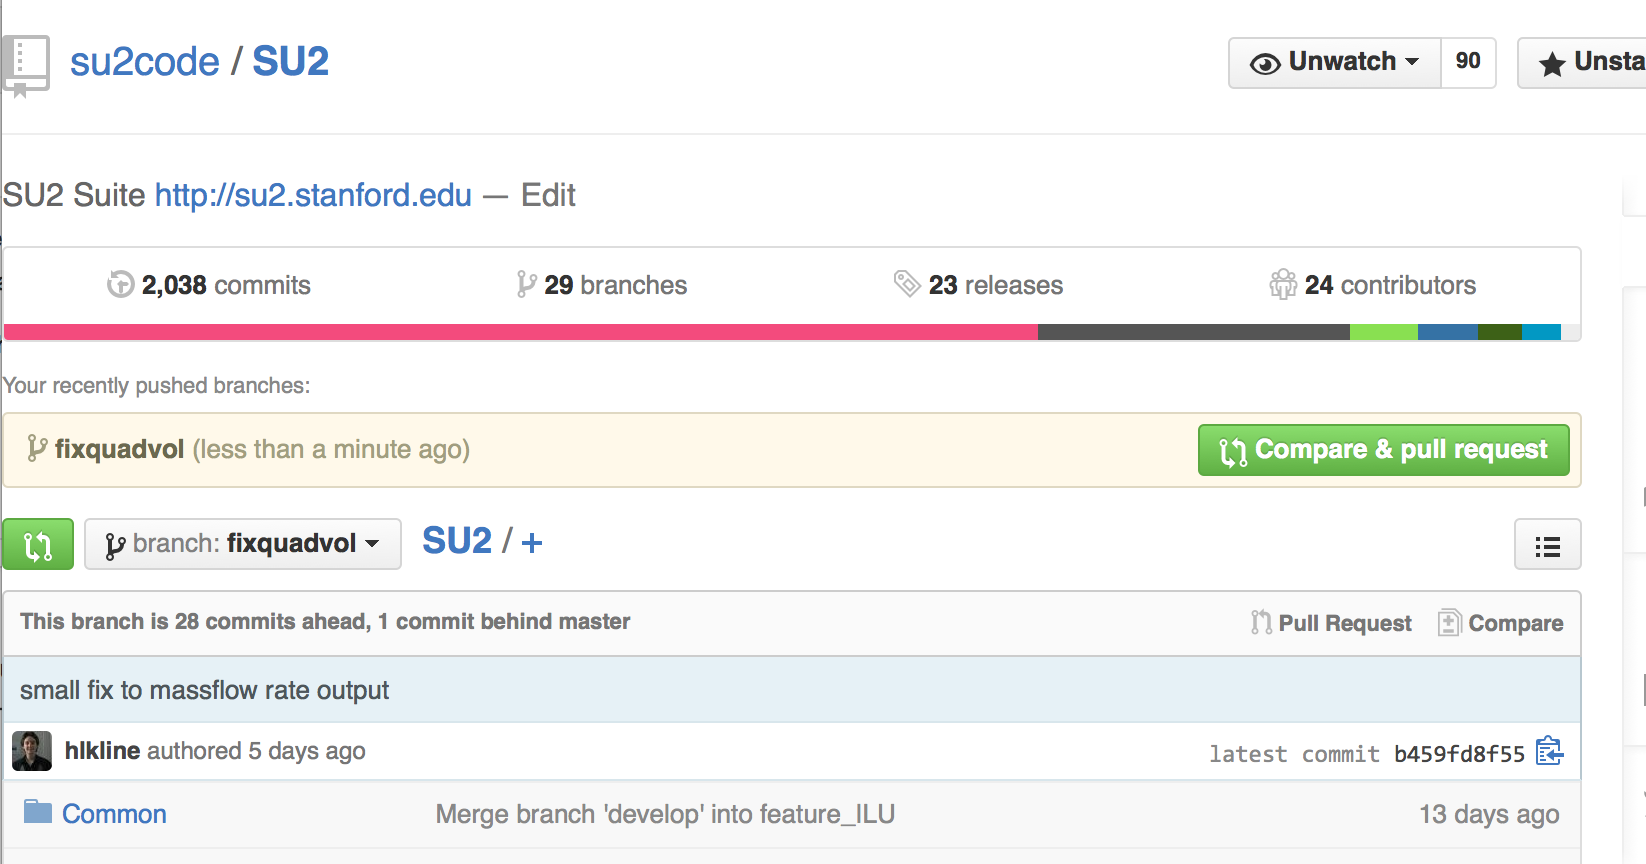
Push the code to the online version of the branch
git push origin fixquadvol -
This will automatically register on github, and you can use the online API to make a pull request
- Now your code is available for code review!